
Sellerio Toolkit for Flipkart
Accept, print and mark Ready to Dispatch from one button — and stop losing the last step.
- Version
- 3.9.1
- Language
- English
- Time needed
- About 7 minutes
sellerio.in · Amazon, Flipkart and Meesho are trademarks of their respective owners. Sellerio is independent and not affiliated with them.
Sellerio Toolkit for Flipkart
Accept, print and mark Ready to Dispatch from one button — and stop losing the last step.
- Time needed
- About 7 minutes
- Cost
- Free
- You need
- Google Chrome
- Version
- 3.9.1
Install the extension
Three steps, about a minute. Nothing is charged and you are not asked for a card.
Open the Toolkit page
In Google Chrome, go to sellerio.in/q/toolkit — that link opens the Toolkit's page directly.
Prefer to find it yourself? Open sellerio.in, scroll down to Free Chrome Extensions, and take the first of the three cards — Sellerio Seller Toolkit.
The Free Chrome Extensions section on sellerio.in — all three cards, with Sellerio Seller Toolkit on the left.
Full section width · light theme
It must be Google ChromeThe Toolkit installs from the Chrome Web Store. Edge, Brave and other Chromium browsers accept Web Store extensions too, but Chrome is what it is tested on.
Click Add to Chrome
Click the blue Add to Chrome button on the Toolkit card. The Chrome Web Store opens in a new tab.
Check you have landed on the right listing: Sellerio — Seller Toolkit for Amazon, Seller Flex, Flipkart & Meesho, published by sellerio.in. Then click Add to Chrome at the top right of that page.
The Chrome Web Store listing header — the extension name, the sellerio.in publisher line, the rating, and the blue Add to Chrome button.
Include the address bar so the store URL is visible
Click Add extension
Chrome asks you to confirm. Click Add extension.
The box says "Read and change your data on a number of websites". That is Chrome's own summary wording, and it is the same sentence it shows for every extension that works inside a website. Click Show Details to see the actual list.
Chrome's Add "Sellerio — Seller Toolkit…"? confirmation box, showing Show Details and the Add extension button.
Crop tight to the dialog
What that list actually containsfour seller panels — Seller Central, Seller Flex, the Flipkart Seller Hub and the Meesho Supplier Panel — plus the storage addresses your marketplaces serve label PDFs from, and Sellerio's own account server. There is no permission to read every site, and none to read your browsing history.
Why those storage addresses are neededFlipkart and Meesho hand out label PDFs from Google Cloud links, and Amazon from its own storage addresses. To crop the file you just asked for, the Toolkit has to be allowed to read it — and it only ever reads the file your marketplace has just given you.
Sign in
A free Sellerio account — Sellerio's own, not your Amazon, Flipkart or Meesho seller login. It is what unlocks the Toolkit and keeps your settings the same on every computer you sign in on.
A tab opens by itself
Nothing to click. The moment the Toolkit installs, it opens its own tab: Welcome to Sellerio.
Choose Create FREE Sellerio account if this is your first Sellerio account, or Sign in to your Sellerio account if you already have one.
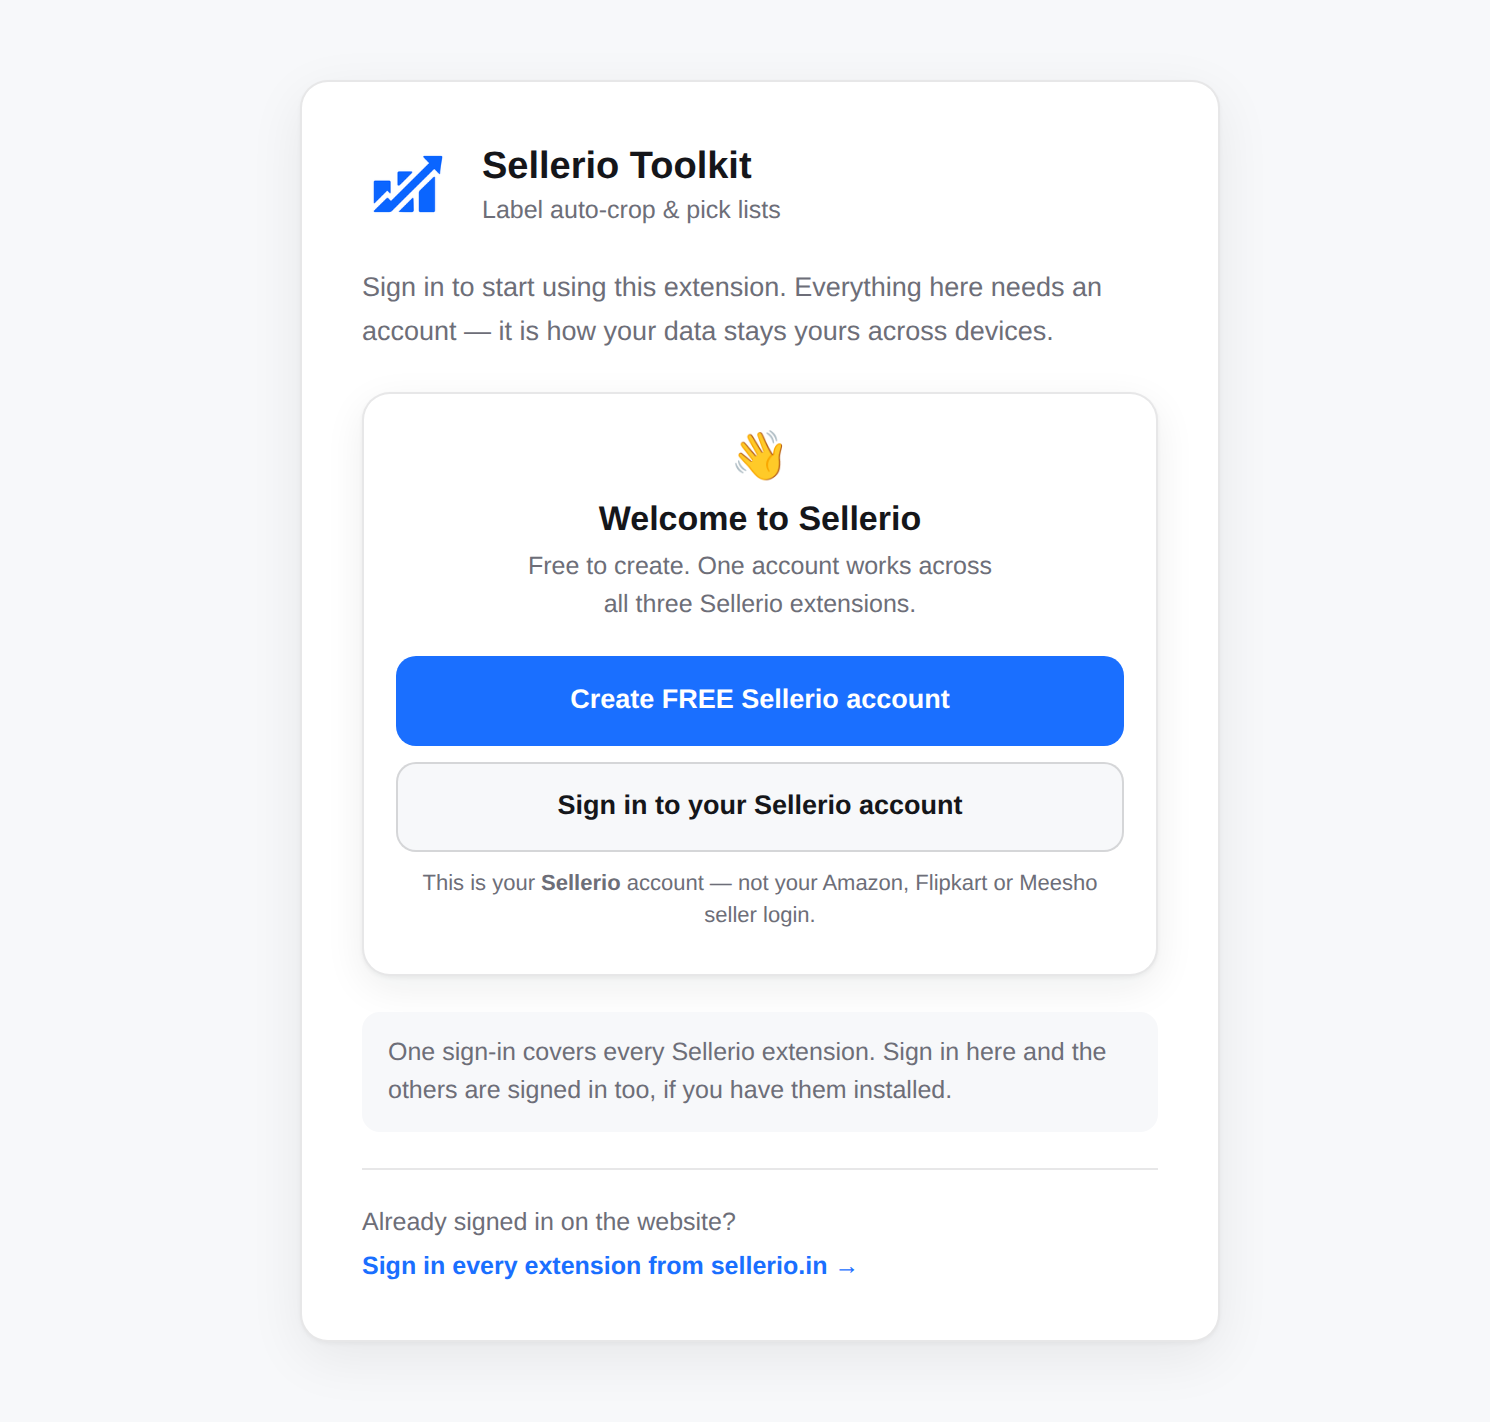
Already use Sellerio Autofill or Insights? You will not see this tab at allThe Toolkit finds the sign-in you already have in this browser and uses it.
Create your free account
Fastest way: click Continue with Google. Or fill in your name, email and a password and click Create account.
Mobile is optional. Nothing is charged and you are not asked for a card.
The sign-up card — Continue with Google at the top, then the name / email / password / mobile fields and the Create account button.
Crop to the card · blur the email if it is real
This is not your marketplace passwordSellerio never asks for your Amazon, Flipkart or Meesho login and never sees it. The Toolkit works inside the seller session you are already signed in to, in your own browser.
It signs you in and closes
You are signed in straight away, and the tab closes by itself. Nothing left to do.
Your settings, saved SKU sizes and saved boxes now follow this account to any computer you sign in on.
First look
The Toolkit already works. These three steps just show you where everything is.
Pin it to your toolbar
Click the puzzle-piece icon in Chrome's toolbar, find Sellerio — Seller Toolkit, and click the pin beside it.
Every setting, the label side panel and both data pages open from this icon. Pin it now and it stays on your toolbar.
Chrome's Extensions menu open, with Sellerio — Seller Toolkit listed and the Pin tooltip showing.
Crop to the toolbar and the open menu
"No access needed" is the right answer hereChrome groups the Toolkit under No access needed on any page that is not one of the four seller panels — it genuinely has nothing to do on this site. Open the Flipkart Seller Hub and it moves into the active group.
Open the toolbar menu
Click the Sellerio icon you just pinned.
Everything is already switched on. Auto-crop labels on download and Print automatically are on, labels are sorted SKU-wise, and every label gets a sequence number. You can change any of it — nothing here needs setting up before your first print.
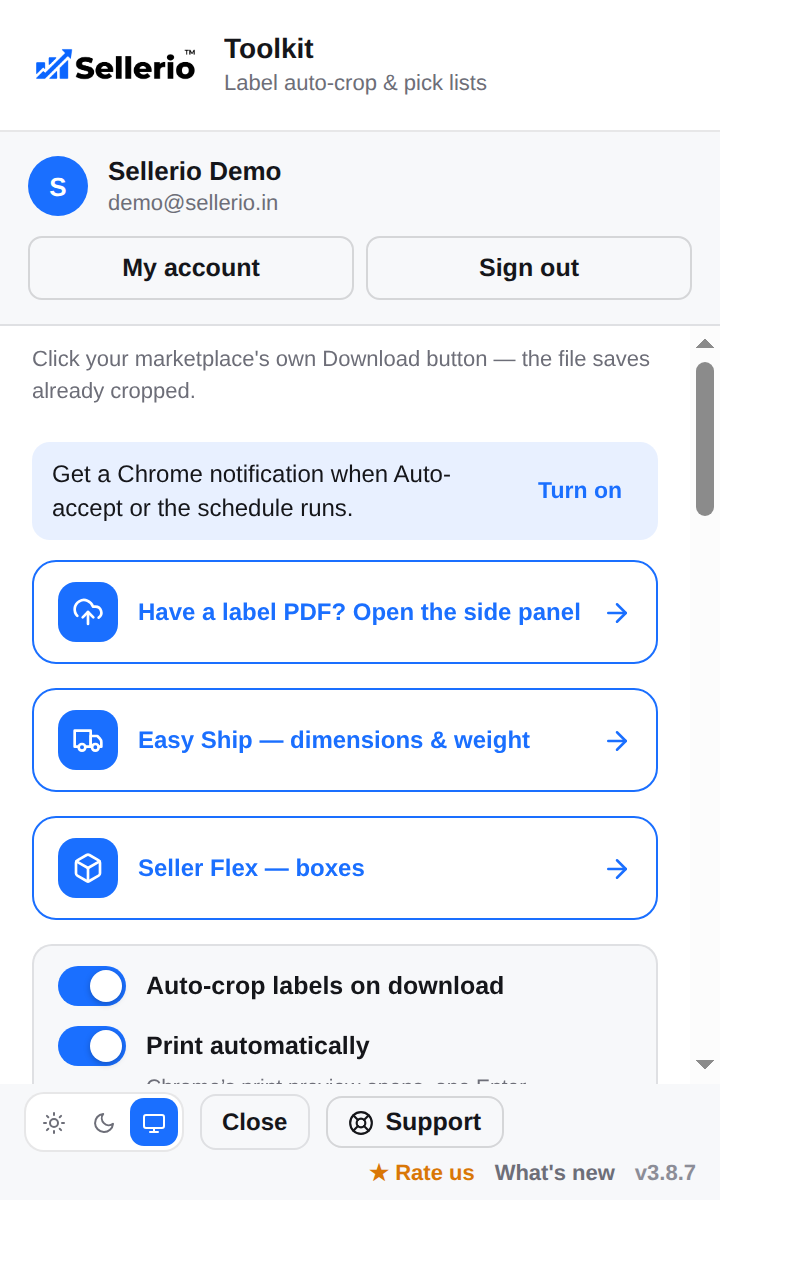
Turn on notifications
In the popup, click Turn on beside the notifications line, then Allow when Chrome asks.
This is how you find out what a scheduled run did while you were away from the screen. Only what the Toolkit does by itself is ever shown — never a label, an order, or a customer's details.
The notification offer line in the popup, and Chrome's Allow prompt.
Two crops side by side, or two shots
Flipkart Seller Hub
Accept, print and mark Ready to Dispatch — the three tiles you work every morning — from one button.
Press Run: Accept → Print → RTD
On the Seller Hub, choose Today, Tomorrow or All, then press Run: Accept → Print → RTD.
It works Flipkart's own tiles in order: To Accept is accepted, Pending to Pack is printed, Pending RTD is marked. The three steps are also there as separate buttons — Accept Orders, Print Labels, Mark RTD — if you would rather run them one at a time. Stop ends a run at any point.
The Sellerio card on the Seller Hub — the tile counts, the day segment, and the Run: Accept → Print → RTD button.
Blur buyer names, addresses and phone numbers
It presses Flipkart's own buttons in your own signed-in sessionNothing about your account changes, and no credential of yours is shared with anyone.
The step that used to get missed
Nothing to do — but this is the one worth knowing about.
If the labels were printed and nothing marked them, those orders sit in To Pack with a live Mark RTD button and nothing tells you. You find out at handover, or from a late-dispatch metric a week later. A run now opens Pending RTD and finishes them, instead of stopping to say there was nothing to label.
Flipkart with labels printed but nothing marked — To Pack 1, Pending RTD 1, a live Mark 1 RTD.
Stage this the day before; it is the most useful shot in this guide
Safe in the direction that mattersIt only hands over to RTD when there was genuinely nothing left to print, and the orders it then marks are the ones Flipkart itself lists under Pending RTD. A print that actually fails still stops the run.
Accept new orders as they land
Switch Auto-Accept on if you want new orders accepted while the tab is open.
It is off until you turn it on, and it only runs while a Seller Hub tab is open. Auto-Refresh reloads the page every 15 minutes so new orders are seen.
Your first labels
You do not learn a new button. You press the one you already press.
Download labels exactly as you always have
Select your orders and press Flipkart's own bulk Print Labels button — for one order or a whole selection.
The Toolkit works under that button. Nothing about your routine changes.
What comes out
The file saves already cropped — and if printing is set up, it is already printing.
- Cropped to 4×6, with the invoice page removed
- The SKU and quantity printed on the front of every label
- Sorted so every label for one SKU comes off together
- Multi-item orders first, each with a large QTY block
- A sequence number in the corner of every label
One finished label, close up — SKU and quantity on the front, sequence number in the corner.
Photograph a printed label flat · blur the buyer address
Why the number mattersif the roll runs out at label 47 of 70, read the last clean number, change the roll, and reprint from 48. Nothing is guessed and nothing is printed twice.
Print without the dialog
Optional, about five minutes, and you only ever do it once per computer.
Set up QZ Tray
In the popup, click Set up printing and follow the steps on that page.
Without this, Chrome's print preview opens with your last printer already chosen — one Enter. With it, there is no preview and nothing to click at all. A copy of every file still lands in your Downloads folder either way.
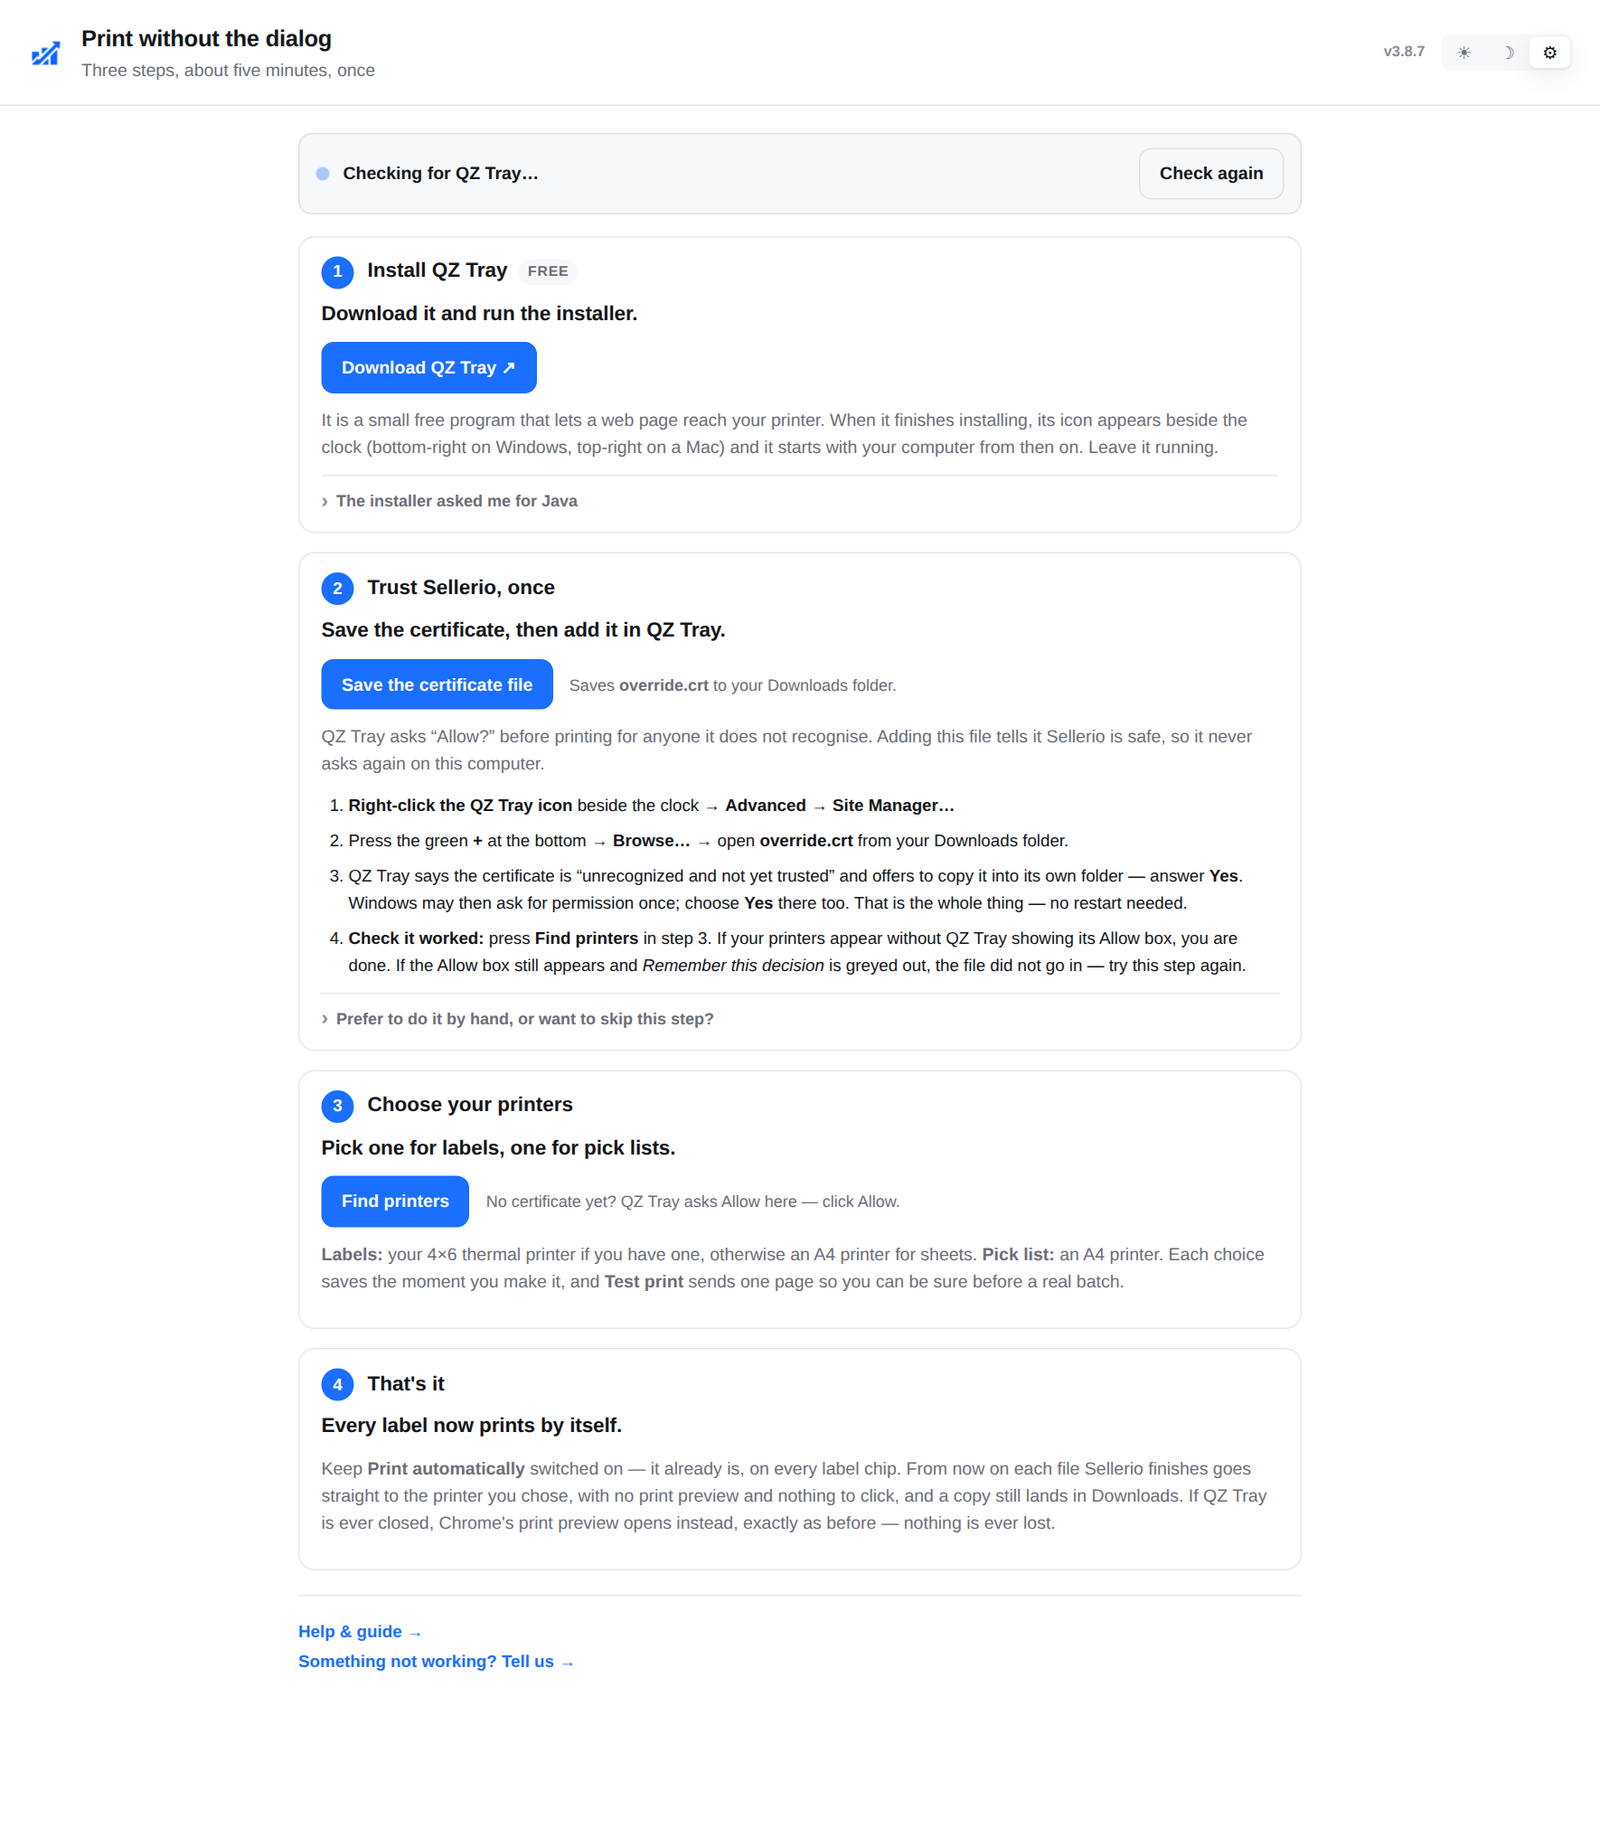
Step 2 is the one people skipGiving QZ Tray Sellerio's certificate is what stops it asking "Allow?" before every single print. Skipping it still works — you just answer that box every time.
Pick two printersone for label files — your 4×6 thermal printer, or an A4 printer if you print onto sticker sheets — and one for the Seller Flex pick list, which is A4. There is a Test print beside each so you can be sure before a real batch.
Let it run every day
The last step, and the one that changes your morning.
Set a daily time
On the Sellerio card, open ⚙, add a time in IST, and choose what should happen at it. There is no daily run until you add one.
Nothing is set for you — a common choice on Flipkart is a late-morning time with Accept + print + mark RTD, for today's orders. At that time the Toolkit runs on the open marketplace tab and sends you a notification saying what it did — and what needs you.
The Daily schedule · IST block — a time set, the plan chosen, and the "Next:" line.
Crop to the card
Two honest limitsChrome has to be running for a scheduled time to fire — a closed browser runs nothing, and a run Chrome fires hours late is skipped rather than run at the wrong time. And you must be signed in to the marketplace; the card tells you if you are not.
It stops rather than guessIf a run meets something it cannot decide — a SKU with no saved size, an order with several items — it pauses on the card and asks. It never invents a weight or a box.
If a page ever asks you to prove you are human
Nothing to do. Everything automatic on that marketplace stops until you press something yourself.
A page showing a security check, reloaded every fifteen minutes all day, is how a seller's account gets rate-limited and then blocked. So a check puts that one marketplace on hold: no refresh, no auto-accept, no scheduled run. Your own clicks always work, and pressing one clears the hold. Holds are per marketplace — a check on Meesho is no reason to stop working on Flipkart.
That is the whole setup
From here the Toolkit works under the buttons you already press. If something does not look right, the Support link below reaches a person.
Full help page → Support →